Project Planning in Project Management Guide
Project planning is a major first step towards a successful project. A project plan is a strategic organization of ideas, materials and processes for the purpose of achieving a goal. Project managers rely on a good plan to avoid pitfalls and provide parameters to maintain crucial aspects of the project, like the schedule and the budget.
Some might rush through the preliminary stages of a project, such as the project plan, but that would be a mistake. Any seasoned project manager can tell you from experience that the more you put in the frontend of a project, the better your results will be on the backend.
What Is Project Planning?
Project planning is one of the first responsibilities of the project manager for a given project. In this stage of the project, the decisions about how to manage and govern are made. A project plan is created and centres on the needs of the stakeholders, the organization and the project itself, of course. This document will then be used to manage all further stages of the project.
The thinking that goes on during the project planning, however, does focus on details as much as it works on a higher level in terms of managing the project. Project planning software can help with organizing both the high-level strategy and the specific details of a project plan.
The Details
The project plan includes everything from who is responsible for completing the project to a description of the project, its goals, outcomes and objectives. It describes when these goals, outcomes and objectives will be reached, and the major deliverables, products or features that will be completed. The project plan also estimates the budget and outlines how to monitor and evaluate progress.
There can be more than one plan presented to stakeholders, who can then choose which they think best suits their needs.
The Structure of Project Planning
How do you plan a product to deliver on its promise? It’s difficult! But project management has a process.
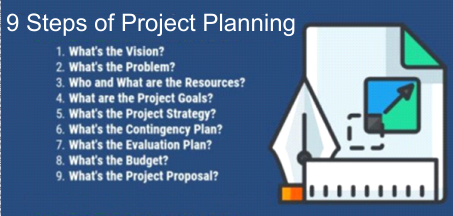
There are steps to take for defining projects and developing an implementation strategy. They are the most important steps in a project. Therefore, you want to involve your team and stakeholders in the process to make sure you’re covering all the bases. Take the time to complete this stage thoroughly.
What’s the Vision?
What’s your vision for the project? This isn’t some pie in the sky hope, but a vision statement, which envisions a problem that needs resolution. That means clarifying the reason for the project. The vision statement is a formal document that states the project’s potential. It’s presented to stakeholders to show the viability of the project and its benefits.
It isn’t a long, detailed document. You can have a short, idealistic vision in terms of the outcome of the project; after all, this is how you sell the project. So, paint a picture of the project’s success, and place it in a larger context.
What’s the Problem?
To support that vision document, you need to identify a problem that needs solving. Therefore, a needs assessment is often required, so you can see the obstacles the business is encountering. This will align the problem you’re addressing with the organization and its strategy. It will also provide you with the necessary data to plan an optimal solution for the problem.
To begin, what information are you gathering? What sources are there for that information, and how will you then gather the information? Next, analyse and determine the problems that your project is being created to resolve. Collect those results in a document.
Who and What Resources?
Next you need to recognize the necessary resources to get the project done. Resources are anything from people to equipment to the facilities necessary to complete the project successfully.
A good way to figure out the resources is the same way journalists approach a news story, with the Five W’s: who, what, where, when and why. Who do you need to execute the project, what resource management tools are required, where will the work be done, when will the project start and end, and why are these resources needed?
What Are the Project Goals?
You can’t achieve your goals if you’ve not first identified them. A goal is something at the end of the project that is both observable and measurable. A goal coincides with the resolution of a problem.
Create a goal statement that explains how the goals are addressed in the project. To do this well, apply the SMART method, which stands for specific, measurable, achievable, realistic and time-relevant. Each goal should be defined by these terms.
What’s the Project Strategy?
To achieve the project goals there must be a strategy in place. A strategy is a process to reach the goals of the project within the project constraints, such as its resources, schedule, budget, etc. How can a strategy be created to achieve the project goals?
Consider precedent and look back on similar projects from the past and what they might have shown in terms of the pros and cons of their applied strategies. Best practices for project management is always a good foundation, and then build a strategy incrementally, creating a pathway to success.
What’s the Contingency Plan?
Any project manager knows that very few things proceed as planned. There needs to be backup plan to respond quickly and rightly to issues as they arise in a project. Therefore, this must be included in your project plan.
Look for the negative risks inherent in the project. They are embedded in various places, such as teams, which might lack skills, have unavoidable absences, turnover, etc. Schedules can be plagued with delays. Scope might have been poorly defined. Costs are underestimated, or funds dry up. Have a plan to address these risks.
What’s the Evaluation Plan?
A project must always be under evaluation. An evaluation plan will help you monitor the project, and maybe even alert you when it starts to veer off track. Use this plan to analyse the components of the project, the outcomes and impacts.
Outcomes are measurable changes, while impacts are how well the project goals are being achieved. Therefore, the evaluation plan is a detailed document that defines a criteria to determine the project effectiveness and efficiency by tracking progress on all aspects of the project.
What’s the Budget?
The budget outlines the financial resources that drive the project. A budget will assign a cost to each of the of the project requirements. Creating a project budget means formalizing financial resources that will be allocated to the project. This begins with choosing a way to estimate costs, identify impacts and report on the evaluation.
What’s the Project Proposal?
All of this leads to a project proposal to explain why the project should be executed and what its benefits are. The previous steps are summarized, writing out the vision of the project and a brief description of the problem that it speaks to. Then state the goals of the project and outline the strategy that will be used to achieve those goals.
Conclusion
That’s a lot of work, but by creating an outline that details these various parts of the project, you’re setting up the project for success. There’s more work after the project is planned and the proposal is accepted by stakeholders, of course, but a lot less work than there would have been if you skimped on any of these steps.
Only a robust project management software can handle all the data needed for a good project plan.
The sections below give more detail on some of the concepts discussed in this summary.
Project Plan
There are many steps that are taken just to get a project approved. The project has to have a goal and then a criteria for defining its success. But once you’ve sold the project with a strong business case and presentation to your stakeholders, the fun really begins.
That’s because now comes the planning. Ideas are great, but without a practical roadmap detailing how you’ll get from concept to creation you’re just spinning your wheels.
No plan has ever just materialized fully formed on your desk. If only. What you need is project planning software that gives you the tools to gather and organize all the dissipate information you need to manage. But let’s start simple and work our way up.
What Makes a Project Plan?
Whether you’ve led many projects or this is your first, it never hurts to remember the fundamentals. Let’s take a moment to look at what the project plan is made up of. First, a project plan is the activities, tasks and resources you are going to use to fulfil your project.
The good news is that much of those broad strokes have already been outlined in your business case, where you proposed the project and explained its expected commercial benefit. But now you have to describe these actual processes by which you’re going to lead that project to success.

Sample Project Plan
Describe the Major Phases of the Project
The plan needs to include all parts of the project, which are as follows.
-
Conception and Initiation: This is a reiteration of the business case, where you described the idea behind the project and how it benefits the organization.
You have already explored this and identified how it can be completed in your business case. You know what to expand upon those ideas and flesh out the concept
of the project and how you plan to meet those demands.
-
Definition and Planning: Now you put the plan down in writing, concentrating on the project’s scope and outlining the work that will need to be performed.
Here’s where you prioritize tasks and calculate your budget and schedule. List all your tasks in order of importance and from that list make an estimate as
to how much money and time will be needed to complete the project.
-
Launch: The execution of the plan you devised begins with allocating the resources and tasks to your team, who are informed of their responsibilities.
This is the start of the actual work, though it doesn’t mean the plan is put aside. There will always be changes that you’ll have to adjust for.
-
Performance and Control: Speaking of those changes, while executing the project, it’s crucial to monitor the estimated progress of your project plan to
the actual progress as recorded by your team’s status updates. This is when you return to the plan to re-allocated resources as necessary to keep on track.
The better you can track the progress of the project, ideally in real-time, the more accurate picture you have of where your project is and what it needs
to stay on track.
- Close: You’re not finished when you’re finished, now you have to get client approval, make sure all the paperwork has been signed off on, payments have been delivered, etc. There are a lot of clean-up duties that you’re still in charge of managing, from onboarding team members to payment of team, vendors, contractors, etc.
So, the project plan is more than just a plan on how to execute the project but as close to a realistic snapshot of the project in its entirety that you can estimate.
Drill Down into Details
The phases are important to break up the project into the parts that make up its life cycle. Now you have to get down to the nitty-gritty of how you’re going to move from one phase to the next.
- Make a Task List: The tasks are the small jobs that make up the whole project. You want to create a detailed list determining every step along the way of your project. Prioritize that list. There will be tasks that are crucial to the project, which must be done, but there will also be some that you can sacrifice without impacting the overall success of the project.
- Duration: Once you’ve collected all the necessary tasks to complete the project, you have to figure out to the best of your ability how long each of them will take to complete. You can only make an estimate, of course, but you should use past experience and any other factors at your disposal to make those guesses as accurate as possible.
- Dependencies: Not all tasks are created equal, some cannot start until the one before it is finished. You need to know which tasks are dependent on one another. A dependent task has the potential to block another team member and throw the whole project off-track. Therefore, be sure to note those on your project plan and link them so you and the team are aware of the importance of completing one before starting the other.
- Resources: The next step is deciding what resources you need to accomplish the tasks in the time you have allotted for each. This can include everything from project planning tools and team members to equipment and office space. You have to manage these resources, so you need to know what they are and plan accordingly.
But there are still more things to consider in your project plan.
- Scope: What are the activities and tasks that must be done to complete your project successfully. You need to document these project goals, from deliverables and tasks to costs and deadlines.
- Milestones: These are major phases or events in your project that are collected to break up the monolith of the project into more digestible parts. They can be added to a Gantt chart, with a description and a delivery date—more on this next.
Using Tools to Create a Project Plan
That’s a lot of information to collect and organize. You can do it the old-fashioned way on paper. Certainly, many in the past have been able to complete big and small projects successfully this way. But there are planning tools that make that work so much easier for you and more efficient and productive for the project.
There are free project plan templates you can use that help you step-by-step in building a project plan. While those are a step in the right direction, they’re standalone documents that are problematic to share. They can be overwritten or duplicates can float around in people’s emails, all of which can lead to muddied communications at best and at worst seriously dire consequences for the project.
It’s not that you should throw away planning templates. They’re a great way to start the process of planning for your project. But a software project management tool is going to give you greater flexibility, more features and a platform on which you can built true collaboration for great project success.
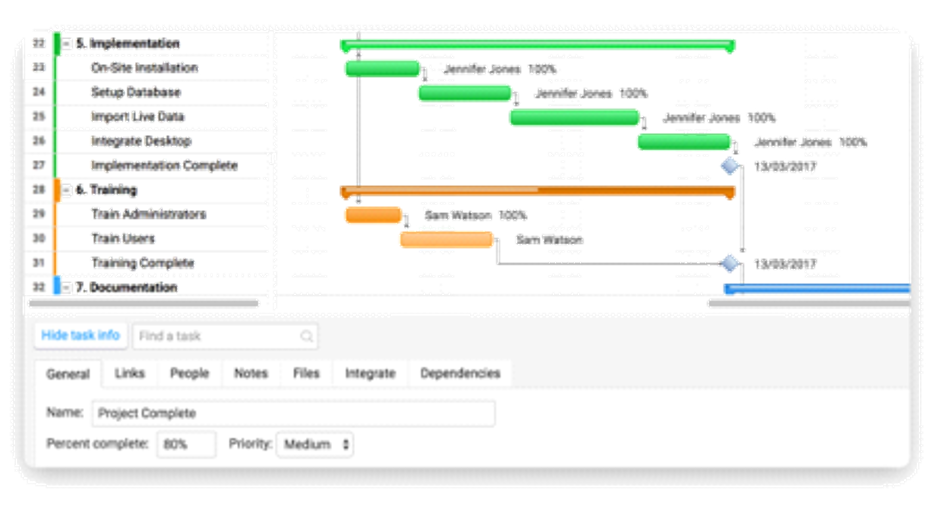
One example is the Gantt chart of which we wrote about above. Gantt charts are great tools to visualize your schedule, with a bar chart that creates a linear timeline showing you tasks, duration and even task dependencies. The latter are linked, so you can see where team members potentially may be blocked.
But when you take your Gantt chart into a software Project Management tool you open up a whole new world of managing possibilities. First, you can easily export your project plan, be it MS Word or an Excel spreadsheet.
All your tasks are saved and stored remotely, they’re easy to share over any device, and collaboration is conducted on the task level. You can attach files and keep the conversation tied to the task at hand.
As we noted, things will change, and a Project Management tool Gantt chart allows you to adjust task durations with a simple drag-and-drop of your cursor. This saves you time, as does the automated notifications that can alert you when a task is completed or about to go off-track, so you can see it in real-time and fix it before it becomes a problem.
Software Project Planning Tools Makes for More Productive Planning
That’s just one of the advantages of planning with a software Project Management tool. You still have to collect all the data, but now it’s collected centrally where it can be easily accessible and shared with team members and stakeholders. Each time you import your task list into project management software it creates the project plan for you, leaving you free to deal with the management of a successful project.
Writing the Perfect Vision Statement
A vision statement almost sounds mystical. But it’s not supernatural, far from it. Rather, a vision statement is a foundational business document.
There is a lot paperwork that clutters the office of any organization, but the vision statement is unique from the rest. Often confused with a mission tatement, the vision statement has a different purpose. A vision statement looks towards the future, but a mission statement talks about what the company is doing in the present.
Because the vision statement is a foundational document that will guide the company’s direction for years to come, consider using collaboration tools and brainstorming techniques to get input from everyone on the team. That way, you’ll get greater buy-in from the company, and you’ll widen your net for collecting ideas.
What Is a Vision Statement?
So, what is a vision statement? It is a document that states the future objectives of an organization. A vision statement is not only used in business. Non-profits and governmental offices also use them to set goals.
The vision statement is intended as a guide to help the organization make decisions that align with its declared set of goals. It can be thought of as a roadmap to where the company wants to be within a certain timeframe.
|
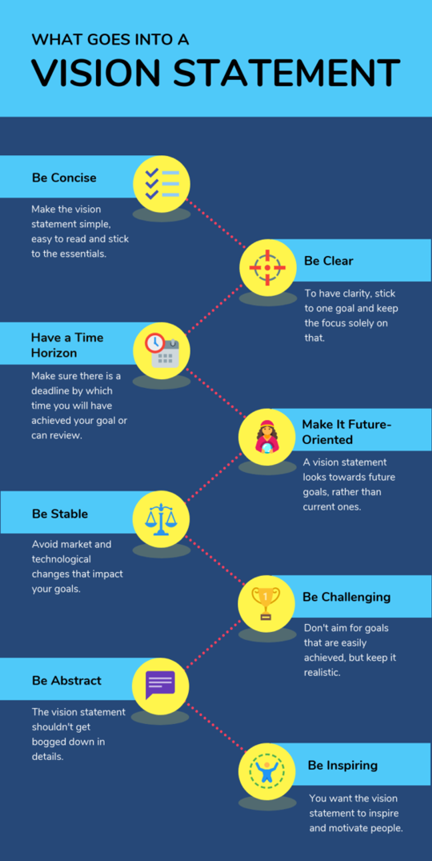
That doesn’t mean a vision statement is set in stone. They can be returned to, reviewed and revised as necessary. Though it is true that any changes should be minimal because a vision statement should have been given a great deal of thought before finalizing it. A vision statement doesn’t have any particular length. It can be as short as an aspirational sentence or pages long, depending on how much detail you want to give it. However long it is, the vision statement is formally written and is used as reference in company documents to serve as a guide for actions now and in the future. What Is the Purpose of a Vision Statement?A vision statement isn’t a pie-in-the-sky document that collects the shared fantasies of the organization and then is filed away. It’s a living document that is referred to as a lodestar to lead a company to its next innovation. Some might think a vision statement is a waste of time, but it fills a vital need for the company. For instance, it sets a broader strategic plan for the organization. It’s very easy to get bogged down on the day-to-day details of running an organization. The vision statement helps you plan long-term. You can set whatever goals you want, but, without motivating your employees to achieve that goal, chances are you’re not going to get anywhere. A motivational vision statement will both motivate existing employees and also drive talent to the company. They’ll want to work at a place with vision. A strong vision statement also works to help differentiate your company from others. All companies want to become profitable, but a company that can set an agenda to achieve that goal is going to set itself apart and inspire others. Use a vision statement to focus the efforts of the organization on the core competencies it needs to achieve its goals. Best Practices for Writing a Vision StatementThere is no template to writing a vision statement, however a common structure for successful ones includes these traits:
|
Examples of Great Vision Statements
These examples prove that a vision statement isn’t a templated document that only differs from other organizations by the branded logo on top of it.
IKEA
“Our vision is to create a better everyday life for many people.” That’s aspirational, short and to the point. More than that, it sets the tone for the company and makes it clear that they’re in the market to offer low-priced good furnishings that suit everyone’s lifestyle.
Nike
“Bring inspiration and innovation to every athlete* in the world. (*If you have a body, you are an athlete.)” Nobody cared much for sneakers in the past. They were just another piece of sports equipment. But Nike saw a future that had not yet existed, in which they delivered products that inspired and motivated people. Notice how they include everyone as an athlete. It’s clever and inclusive.
McDonald’s
“To be the best quick service restaurant experience. Being the best means providing outstanding quality, service, cleanliness and value, so that we make every customer in every restaurant smile.” The power of this vision is that it’s constructed like a checklist. The word best is a word that requires definition, and McDonald’s provides it with qualifiers, making the roadmap to success clearly marked with signposts.
Patagonia
“Build the best product, cause no unnecessary harm, use business to inspire and implement solutions to the environmental crisis.” Talk about inspiring, Patagonia first outlines what the best product means for them as a company. Then takes it one step further by stating they’ll run their business to carry that environmental policy to a global level.
Oxfam
“A world without poverty.” This may seem to contradict one of the traits of a good vision statement in that it feels unrealistic. But as challenging visions go, it’s hard to see how anyone wouldn’t be inspired and motivated by this short and powerful one.
Resource Planning
When managing a project or a project portfolio, it’s critical that you intelligently distribute resources and workload. Without proper resource allocation, projects can quickly get out of control in terms of expense and duration.
What is Resource Planning?
What is resource planning? The short answer is that resource planning is the step in writing a business plan where you identify all the resources in a proposed project.
Sounds simple enough. But to plan resources, you need to create a summary for managing workload that is comprehensive enough to make sure all the resources that you need to complete the project are clearly identified. This summary is going to help you get buy-in from your sponsor and your team.
What are Resources?
Resources can be anything from equipment to project sites to people. Here’s a short list of some resources you’ll have to identify when planning your project:
- Type of team you’ll need
- Roles and key responsibilities for each team member
- Number of people required to fill each role
- What equipment they’ll need and its purposes
- Job locations or meeting rooms required
- Types and number of equipment needed
- Total amount of material needed
How to Create a Resource Plan
A resource plan has to:
- Schedule the dates for using the planned resources. That includes when and for how long you’ll need the people assigned to your team, equipment rental, project site rental and anything else.
- Identify the amount of resources required per project activity. Each day you’ll be using many resources. Use this part of the plan to detail them on a daily basis.
- Create a detailed resource use schedule. Now take those durations and amounts and collect them on a calendar or timeline to make sure you’ve allocated those resources correctly.
In order to include all that information, you want to have a process in place. Basically, it’s a three-step process of listing, estimating and then constructing. Let’s go through each of those steps in more detail.
Step 1: List the Resources
Simply start a list in your project management software. Write down all the different resources you’ll need. Use the above bullet points as a structure. Who do you need to do the tasks that make up the project? Identify all of those roles. That includes full-time, part-time and contractors.
Now, what about equipment? Do the same as you did with the labour, and identify all the equipment you’re going to need to get the project completed. That list should include anything from office equipment such as computers, photocopies and other devices to telecommunications and machinery.
The next item on the list is the materials. What are the non-consumable materials you’ll need to complete the project activities? These can be materials necessary to build physical deliverables, such as wood, steel, and concrete.
Step 2: Estimate How Many Resources
Now you want to figure out how many of the listed resources you’ll need throughout the life cycle of the project. For example, how many hours are you going to need from your team? Break that down per role. Do the same for your equipment. How many pieces of equipment are going to be necessary?
The same goes with your material. Estimate what amount of material, in terms of square footage, number of units, etc., is going to be necessary for the project. How much hardware do you need to buy, and will you have to license software?
Get as accurate an estimate as you can, and enter that data into your project management software. If possible, try to note the date the resources are needed and what the consumption rate per day, week or month is. The more data you have, the better you can allocate various resources.
Step 3: Construct a Resource Schedule
Use the information you’ve collected in the first two steps to build a detailed resource schedule in your workload management tool. You’ll want to specify the resources required to complete the project, the time-frames for the consumption of each of those resources and the quantity of time each resource is going to require per week and/or month.
Then you want to add up the total quantity of resources consumed per week and/or month. Don’t forget to identify the assumptions and constraints you feel are going to arise over the life cycle of the project.
How to Create SMART Goals
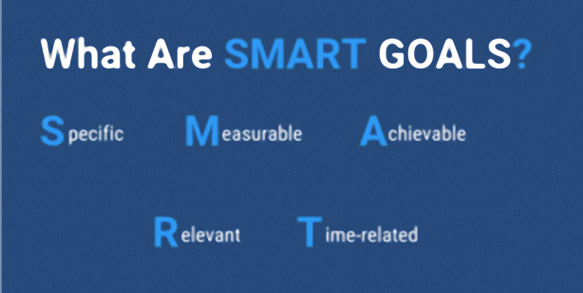
SMART is a mnemonic acronym that establishes criteria for ideal goals and objectives in a project. Goals and objectives should always be “SMART”, which stands for Specific, Measurable, Achievable, Relevant and Time-Related. This set of criteria helps managers both recognize their goals and create a structural guide to achieve them.
SMART first appeared in a 1981 issue of the magazine Management Review, in a paper by Gorge T. Doran titled, “There’s a SMART Way to Write Management’s Goals and Objectives.” The paper discussed objectives and how difficult, yet critical, it is to set them. He created SMART to help guide managers in their objective setting process.
Within that simple set of criteria is a guide to help teams be more productive, while always keeping goals in mind. Without goals there is no focus, and without focus the chance of successfully completing a project is slim.
What Does SMART Mean?The acronym is easy to remember. As mentioned, SMART stands for specific, measurable, assignable, realistic and time-related. But what does that really mean? SpecificBegin by defining what it is that you’re trying to achieve. Be specific. Ask the Five W’s: who, what, why, where and which. For example:
|
|
Measurable
In order for a goal to be SMART, it must be measurable, and in order to track your progress towards your goal, you have to know how to measure it. That keeps you on track and motivates you to finish on time. So, in order to be successful, you need to regularly monitor and assess your progress.
Also, you have to know how to tell when you’ve reached that goal, so as not to waste time once it’s already been achieved. Basically, you must set up metrics to measure your progress. Project milestones can help break up a timeline if a project extends over some months.
Achievable
There’s no point having and measuring a goal that’s impossible to achieve. Therefore, another criterion for a SMART goal is discerning if the goal you’ve defined is realistic. You want to reach beyond what you think is possible (because nothing is achieved by playing it safe), but not so far that the project comes crashing down on top of you.
You must know your resources well, and ask if this goal can be accomplished considering the constraints under which you’re working, which include scheduling and costs.
Relevant
The goal is now defined, measurable and achievable, but is it relevant? A SMART goal has to be relevant, and that doesn’t mean just to you but to the organization writ large.
That means your goal, even after meeting all the prior criteria, must now align with other relevant goals because success requires the support and assistance from everyone on the project team. Therefore, it must work in congress with other parts of the project and the overall strategy of the organization.
This creates a whole new set of questions such as, is the goal worthwhile? Maybe the time isn’t right. Does it match other needs? Maybe you’re not the right person to lead this initiative, or maybe it’s not aligned with current economic or social trends. If it offers the right answers to these questions, then it’s relevant.
Time-Related
A SMART goal will always be time-related because goals often cannot be achieved without a deadline. A deadline serves as a great motivator and can provide context for you to recognize the various tasks necessary to reach that goal in the time allotted. Therefore, giving the goal time constraints helps keep you on track.
Naturally, you must answer questions, such as: when must the goal be achieved? Then get more specific, is that in six months, six weeks, six days? Without a timeframe you can’t devise a plan, and the goal will never be realized.
Creating SMART Goals
Now that SMART is clearly defined, how do you create SMART goals? Well, it should be obvious now that the process starts with asking a lot of questions. Pose questions to yourself, your team and even stakeholders. The answers to these questions will whittle down your options and sharpen your strategy. From there, goals will become clear and attainable.
Be Positive and Optimistic
While being realistic is part of the process, it’s important not to let a cynical attitude curb your efforts. Be positive. What do you want to achieve? Think big; you can always pull back if necessary. On the contrary, it’s difficult to expand on a conservative idea.
The great thing about using SMART as a method to define your project goals is that it’s not a tedious exercise. It can be fun, and it is always going to leave you with greater insights into your goals.
SMART Can Apply to Any Goal
Whatever the goal, run it through SMART to discover if it’s worth the time and effort. First, be specific: what is the project and what product, service or problem is it addressing?
Then, how can you measure the progress of that project? What is it you want to achieve and by what date? Then working backwards, you can set up a task list and a metric to see if you’re following that schedule. Basically, you’re building a project dashboard to measure the various aspects of the project against a baseline you have created in the planning stage.
In terms of whether or not it can be achieved, make sure that the organization is on board with the project. The project will have to align with the company’s overall strategy. But is it also relevant? Will the project in fact solve a problem or produce a useful product or service?
Finally, what’s the time constraint? How long do you have to complete the project and still be able to take advantage of the opportunity that the project was created to exploit?
All this information will combine to help you define and reach SMART goals. But the SMART criteria are not chiselled in stone. It can be flexible and is open to revision as needed. So, monitor and evaluate key metrics as your project progresses to make sure that the goal you set is in fact smart!
6 Steps in the Risk Management Process
Would you buy a T-shirt that said, “Risk Happens”? If you answered yes, then you’re a project manager. Risk is part of your planning makeup. When you start the planning process for a project, one of the first things you think about is: what can go wrong?
It sounds negative, but it’s not. It’s preventative. Because issues will inevitably come up, and you need a mitigation strategy in place to know how to manage risks on your project.
|
But how do you work towards resolving the unknown? It’s sounds like a philosophical paradox, but it’s not. It’s very practical. There are many ways you can get a glimpse at potential risks, so you can identify and track risks on your project. To manage risks effectively, follow these 6 steps in your risk management process. A Short Definition of TermsBefore we get started on a risk management plan, it’s a good idea to define some terms that can be confused. Risk: something that might happen that will have an impact, either positively or negatively, on the project. It can be an event or a condition. Issue: something that has already happened in a project, which might have been a risk previously identified, or another unknown problem that can have a small or large impact. |
You’re going to have both, of course, when you execute your project. But you’re going to handle them slightly differently, so it’s best to start off avoiding any mix-ups.
Risk Management Steps
So, how do you handle something as seemingly elusive as project risk management? The same way you do anything when managing a project. You make a risk management plan. It’s all about process.
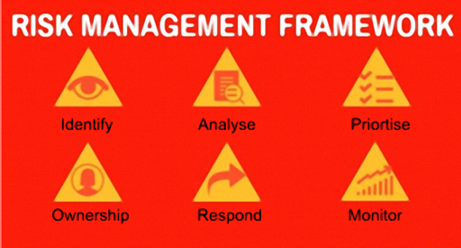
Process can make the unmanageable manageable. You can take what looks as if a disadvantage and turn it into an advantage if you follow these six steps.
Identify the Risk
You can’t resolve a risk if you don’t know what it is. There are many ways to identify risk. As you do go through this step, you’ll want to collect the data in a risk register.
One way is brainstorming or even brainwriting, which is a more structured way to get a group to look at a problem.
As noted earlier, you can tap your resources. That can be your team, colleagues or stakeholders. Find those individuals with relevant experience and set up interviews so you can gather the information you’ll need to both identify and resolve.
It doesn’t hurt to speak with that person in your organization who is the glass is always half-empty type. Their doom-and-gloom perspective can be surprisingly helpful to see risks that might not be evident to everyone else.
Look both forward and backwards. That is, imagine the project in progress. Think of the many things that can go wrong. Note them. Do the same with historical data on past projects. Now your list of potential risk has grown.
As you’re identifying risk, you’ll want to make sure you that your risk register isn’t filling up with risks that are really outliers and not risks at all. Make sure the risks are rooted in the cause of a problem. Basically, drill down to the root cause to see if the risk is one that will have the kind of impact on your project that needs identifying.
When trying to minimize risk it’s good to trust your intuition. This can point you to unlikely scenarios that you just assume couldn’t happen. Remember, don’t be overconfident. Use process to weed out risks from non-risks.
Analyse the Risk
Okay, you’ve got a lot of potential risks listed in your risk register, but what are you going to do with them? The next step is to determine how likely each of those risks are to happen. This information should also go into your risk register.
When you assess project risk you can ultimately and proactively address many impacts, such as avoiding potential litigation, addressing regulatory issues, complying with new legislation, reducing your exposure and minimizing impact.
Analysing risk is hard. There is never enough information you can gather. Of course, a lot of that data is complex, but most industries have best practices, which can help you with your analysis. You might be surprised to discover that your company already has a framework for this process.
So, how do you analyse risk in your project? Through qualitative and quantitative risk analysis, of course. What does that mean? It means you determine the risk factor by how it impacts your project across a variety of metrics.
Those rules you apply are how the risk influences your activity resources, duration and cost estimates. Another aspect of your project to think about is how the risk is going to impact your schedule and budget. Then there is the project quality and procurements. These points must be considered to understand the full effect of risk on your project.
Prioritise the Risk
Not all risks are created equally. You need to evaluate the risk to know what resources you’re going to assemble towards resolving it when and if it occurs. Some risks are going to be acceptable. You would grind the project to a halt and possibly not even be able to finish it without first prioritising the risks.
Having a large list of risks can be daunting. But you can manage this by simply categorizing risks as high, medium or low. Now there’s a horizon line and you can see the risk in context. With this perspective, you can begin to plan for how and when you’ll address these risks.
Some risks are going to require immediate attention. These are the risks that can derail your project. Failure isn’t an option. Other risks are important, but perhaps not threatening the success of your project. You can act accordingly.
Then there are those risks that have little to no impact on the overall project’s schedule and budget. Some of these low-priority risks might be important, but not enough to waste time on. They can be somewhat ignored, because sometimes you just should let stuff go.
Assign an Owner to the Risk
All your hard work identifying and evaluating risk is for naught if you don’t assign someone to oversee the risk. In fact, this is something that you should do when listing the risks. Who is the person who is responsible for that risk, identifying it when and if it should occur and then leading the work towards resolving it?
That determination is up to you. There might be a team member who is more skilled or experienced in the risk. Then that person should lead the charge to resolve it. Or it might just be an arbitrary choice. Of course, it’s better to assign the task to the right person, but equally important in making sure that every risk has a person responsible for it.
Think about it. If you don’t give each risk a person tasked with watching out for it, and then dealing with resolving it when and if it should arise, you’re opening yourself up to more risk. It’s one thing to identify risk, but if you don’t manage it then you’re not protecting the project.
Respond to the Risk
Now the rubber hits the road. You’ve found a risk. All that planning you’ve done is going to get implicated. First you need to know if this is a positive or negative risk. Is it something you could exploit for the betterment of the project?
For each major risk identified, you create a plan to mitigate it. You develop a strategy, some preventative or contingency plan. You then act on the risk by how you prioritized it. You have communications with the risk owner and, together, decide on which of the plans you created to implement to resolve the risk.
Monitor the Risk
You can’t just set forces against a risk without tracking the progress of that initiative. That’s where the monitoring comes in. Whoever owns the risk will be responsible for tracking its progress towards resolution. But you will need to stay updated to have an accurate picture of the project’s overall progress to identify and monitor new risks.
You’ll want to set up a series of meetings to manage the risks. Make sure you’ve already decided on the means of communications to do this. It’s best to have various channels dedicated to communication.
You can have face-to-face meetings, but some updates might be best delivered by email or text or through a project management software tool. They might even be able to automate some, keeping the focus on the work and not busywork.
Whatever you choose to do, remember: always be transparent. It’s best if everyone in the project knows what is going on, so they know what to be on the lookout for and help manage the process.
How to Improve Your Project
|
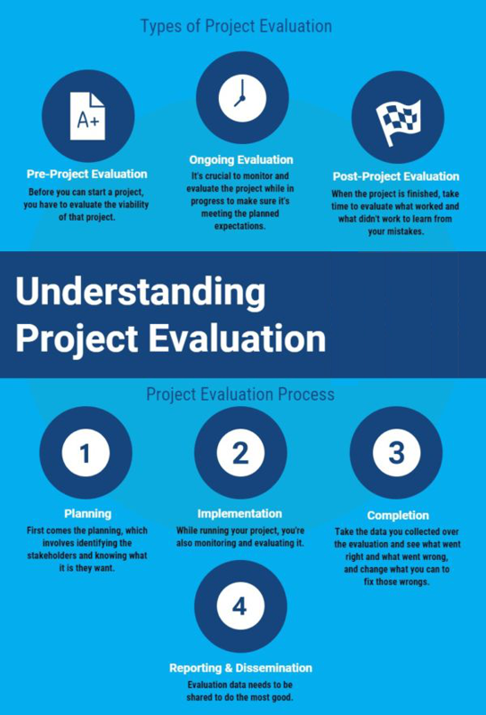
The project evaluation process uses systemic analysis to gather data and reveal the effectiveness and efficiency of your management. This crucial exercise keeps projects on track and informs stakeholders of progress. Every aspect of the project is measured to determine if it’s proceeding as planned, and if not, inform how project parts be improved. Basically, you’re asking the project a series of questions designed to discover what is working, what can be improved and whether the project is in fact useful. Tools like project dashboards and trackers help in the evaluation process by making key data readily available. The project evaluation process has been around as long as there have been projects to evaluate. But when it comes to the science of project management, project evaluation can be broken down into three main types: pre-project evaluation, ongoing evaluation and post-project evaluation. So, let’s look at the project evaluation process, what it entails and how you can improve your technique. Three Types of Project EvaluationThere are three points in a project where evaluation is most needed. While you can evaluate your project at any time, these are points where you should have the process officially scheduled. Pre-Project EvaluationIn a sense, you’re pre-evaluating your project when you write your project charter to pitch to the stakeholders. You cannot effectively plan, staff and control a new project if you’ve first not evaluated it. Pre-project evaluation is the only sure way you can determine the effectiveness of the project before executing it. Ongoing EvaluationTo make sure your project is proceeding as planned and hitting all the scheduling and budget milestones you set, it’s crucial that you are constantly monitoring and reporting on your work in real-time. Only by using metrics can you measure the success of your project and whether or not you’re meeting the project’s goals and objectives. Post-Project EvaluationThink of this as a post-mortem. The post-project evaluation is when you go through the project’s paperwork, interview the project team and principles, and analyse all relevant data so you can understand what worked and what went wrong. Only by developing this clear picture can you resolve issues in upcoming projects. |
|
What’s a Project Evaluation Process Look Like?
Regardless of when you choose to run a project evaluation, the process always has four phases: planning, implementation, completion and dissemination of reports.
Planning
When planning for a project evaluation, it’s important to identify the stakeholders and what their short- and long-term goals are. You must make sure your goals and objectives for the project are clear. It’s critical to have settled on a criterion that will tell you whether these goals and objects are being met.
So, you’ll want to write a series of questions to pose to the stakeholders. These queries should include subjects such as the project framework, best practices and metrics that determine success.
By including the stakeholders in your evaluation plan, you’ll receive direction during the course of the project while simultaneously developing a relationship with the stakeholders. They will get progress reports from you throughout the project’s phases, and by building this initial relationship, you’ll likely earn their belief that you can manage the project to their satisfaction.
Implementation
While the project is running, you must monitor all aspects to make sure you’re meeting the schedule and budget. Some of the things you should monitor during the project is the percentage completed. This is something you should do when creating status reports and when meeting with your team. To make sure you’re on track, make the team accountable for delivering on their tasks. Also, maintain baseline dates to know when tasks are due.
Don’t forget to keep an eye on quality. It doesn’t matter if you deliver within the allotted time frame if the product is poor. Maintain quality reviews, and don’t delegate that responsibility. Take it on yourself.
Maintaining a close relationship with the project budget is just as important as tracking the schedule and quality. Keep an eye on costs. They will fluctuate throughout the project, so don’t panic. However, be transparent if you notice a need growing for more funds. Let your steering committee know as soon as possible, so there are no surprises.
Completion
When you’re done with your project, you still have some work to do. You want to take the data you gathered in the evaluation and learn from it, so you can fix problems that you discovered in the process. Figure out what the short- and long-term impacts are of what you learned in the evaluation.
Reporting and Disseminating
Once the evaluation is complete, you need to record the results. This creates a historic record that will provide lessons for the future. Deliver your report to your stakeholders to keep them updated on the progress of the project.
How are you going to disseminate the report? There might be a protocol for this already established in your organization. Perhaps the stakeholders prefer a meeting to get the results face-to-face. Or, they might like to get PDFs with easy-to-read charts and graphs. You must know your audience and target your report to them, as well as their preferred format.
How Dashboards Can Improve the Project Evaluation Process
To take your project evaluation to the next level, you’ll want a software project management tool with live dashboards that deliver real-time data, so you can monitor what’s happening now as opposed to what happened yesterday.
The importance of real-time data for an effective project evaluation process cannot be understated. Old data might not help you in time to address issues, and your evaluation will be stale before the ink dries on the report (unless you share it digitally, but you get the picture). Dashboard widgets provide business intelligence in a timely manner, offering metrics to monitor your tasks, teams, cost, health and more.
The dashboard, like the one in your car, collects all the valuable information you need to drive a project forward successfully in one place. That means you can see at a glance how your project is progressing. There is no better tool to give you the data you need, when you need it.
You can track workload and tasks, because your team is updating their status in real-time, wherever they are and at whatever time they complete their work. You’re getting the most accurate picture of the project possible.
Dashboards are easy to set up in a project management software because all the planning data, Gantt charts and task lists are fed into the dashboard. The dashboard crunches the numbers for you, and then creates colourful graphs and charts that make those figures simple to understand. Even better, those graphs and charts can be filtered to reflect only the data you want and then shared in whatever format you prefer, with only a keystroke.
Project evaluation with dashboard software makes it simple to go through the evaluation process during the execution of the project, but it can also provide valuable data afterwards. I think you’ll find that the project evaluation process can even be fun, given the right tools.
How to Create & Manage a Project Budget
Project Budgeting Software
Whether you’re a numbers person or not, as a manager, ownership of a budget is usually a key part of your job responsibilities. It can be a daunting task, and projects can have several different types of costs that all need tracking in order to ensure that everything comes in under budget.
All of those moving parts and fluctuating costs can be better tracked with a software project management tool. We offer tools that simplify project budgeting and cost management, enabling you to set a baseline, track labour rates and add new costs on a task level. With these features, you can simply update and add items as they arise throughout the project. But before you can manage a budget, you need to learn how to create one with accurate estimates.
How to Create a Project Budget
The key to creating a project budget is to make all the line items easy to track. If you can apply a straightforward process to project expenses, then you can monitor the spending on a project accurately and timely.
Follow these simple steps for building a project budget that will set you up for success.
Identify Expenses
The first step in creating a budget is to identify expenses. You need to list every single thing that’s required to bring a project to completion. This includes wages for labour, equipment, materials and more.
You’ll want to examine your project plan thoroughly and identify expenses on your own to start. Then, your team members might be able to help you recognize certain expenses that you didn’t recognize immediately, so be sure to ask them to look over your expense list when creating a budget. It’s imperative that you list absolutely every expense. The more you identify, the less you’ll be surprised by unforeseen expenditures later in the project.
Estimate All Costs
Now estimate every item on your list. There are a number of strategies that you can use to make your estimates. The most common estimating techniques are:
- Bottom Up Estimating: Start with the components of each task and then add them up
- Expert Judgement: Ask experts on your team to work out the cost of a task
- Analogous Estimating: Use past experience to judge how much the project tasks will cost this time.
Add up all of the estimates. This gives you the total planned budget for the project covering the cost of every task.
Add in the Extras
Extras? What extras?
Well, the cost of each individual task isn’t going to be enough, unfortunately. You still might want to add:
- Management Reserves: This is a pot of money to use at management’s discretion.
- Contingency: Contingency costs are useful to cover unforeseen costs due to poor estimating. It’s common practice to add in a contingency of 10% just in case the estimates turn out to be inaccurate.
- Risk Response Budget: If your company is mature at managing project risk, you might be able to incorporate the risk response budget separately to your main budget. The risk response budget includes funding to implement any risk mitigating actions.
Why You Need a Project Proposal
What is a project proposal? In short, it’s a request for buy in and support, usually in the form of financial assistance, to start a project. It outlines the plan and organization of that project in detail.
You can think of a project proposal as the vehicle in which you deliver the rationale for your project. It’s a formal communications document that exists to convince your sponsor or boss that the project has a good reason for existing, in that it addresses a specific problem or exploits a unique opportunity.
The project proposal is created to kick-off a new project. In it, you’ll collect details about what you need and why you need it in order to successfully initiate and execute the project. It must be in-depth, but clear as to convince the sponsor of its value. The whole project literally rests on this document, because after reviewing it, the sponsor will either approve or pass on the project.
A project proposal is necessary when coordinating resources, tasks, equipment and materials within a timeframe in order to reach a business objective. It helps you structure the project so that it remains on track with your goals and objectives. This focus is what leads to a successful project.
The proposal should be authored by the project manager, though that is not always the case. Sometimes a project manager will come on board a project after the proposal has been approved, and they’ll inherit the document and be expected to carry it out.
Either way, when a proposal has been approved, the next step is writing a business case. That is a document in which the financial requirements are outlined and explained. Also, you’ll have to write a project charter to scope out the project and make sure that all parties involved know what is required.
Project proposal templates can help save time during the busy project kick-off phase. A project proposal is involved enough that you don’t want to also be generating a new outline every time you start a different project.
These articles were originally published by ProjectManager.com
Copyright 2018 © ProjectManager.com
3420 Executive Center Drive, Austin, USA 78731

